


Are you sick of having to launch Satisfactory to host a dedicated server for you and your friends?
This has been a problem for myself and many other Satisfactory gamers since the game came out.
The good news is that the devs over at Coffee Stain Studios made our Satisfactory dedicated server dreams a reality.
In this guide, I’ll show you:
If you get stuck at any time or have questions, make sure to join our Discord server and ask one of our team to help you out getting started.
So let's get right into it with the requirements.
The recommended system specifications for Satisfactory are as follows:
Please note, that this is not set by the developers, this is something we recommend after doing our own stress testing.
You can START the server with fewer resources but it will quickly run out once you start adding more players and your world gets more complex.
Also, something to keep in mind, if you're running on a lower-power VPS (Virtual Private Server), you will experience lower performance. This means that even if you have 50 ping, it will feel like you have 500 or 1000 ping. A $5 - $10 VPS is not designed for gaming, they are designed for websites.
You can run a lower player count server on a VPS such as Vultr HF very comfortably. This VPS has a higher core clock count than most budget VPS servers that are made for websites.
You can read our full review of Vultr here: https://www.ghostcap.com/vultr-review/
Once you start getting above player counts of 8 we recommend moving to a dedicated server.
Just before we start, I have a video following this guide below, and if you get stuck, just come and join us on Discord and we will help out.
There are currently a few ways to run a Satisfactory server but we will be showing you the best (and easiest) way using Pterodactyl.
We use Pterodactyl over other options as it just works out of the box. Pterodactyl is a free-to-use game server management panel that makes managing and updating multiple game servers a breeze.
We know you can use other game panels or SRCDS directly, but they are overly complicated or not suitable for a server that needs to stay running for a long period of time.
This also means you will be able to quickly run and configure other games such as a Minecraft or Rust Server with just a matter of clicks!
If you already have your own dedicated server or VPS, start at Step 3.

For this, you need a VPS or dedicated server. To do this you simply need to set up an account at
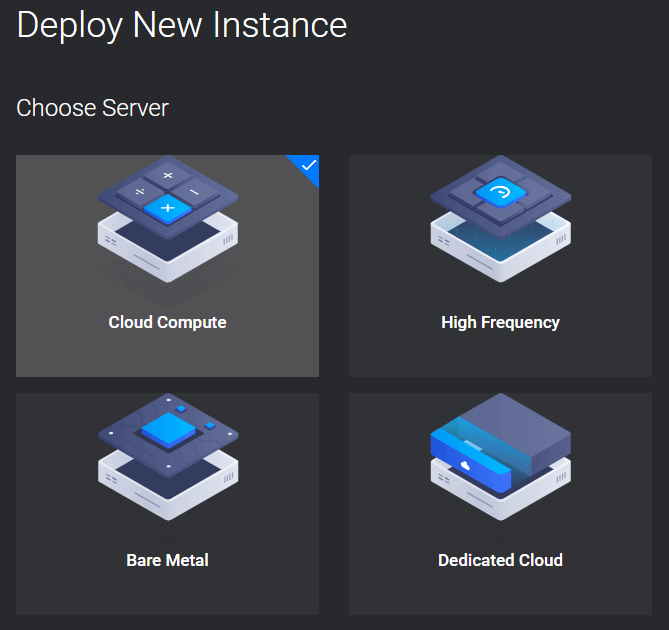
After you have set up your account you need to click on Products and choose the size VPS you need. As Satisfactory dedicated servers are quite heavy on resources, we suggest you go with a “High Frequency” VPS to start with (don't worry, you can upgrade later)
You then need to select the location that is closest to you to ensure you have the best ping.
For this guide, you want to be using Ubuntu 20.04 as the operating system.
After your server has started up, you will need to install Pterodactyl. We have a written guide you can follow here or a video you can watch if that's more your thing. It shouldn't take more than 15 - 20 mins to do. In that guide, you can start from Step 7

Now we need to create a custom nest that will hold our eggs. Eggs as scripts Pterodactyl uses that hold the configuration for the game server you want to install. Simply go to Settings > Nests > Create New.
For this guide, we will call it “Custom”
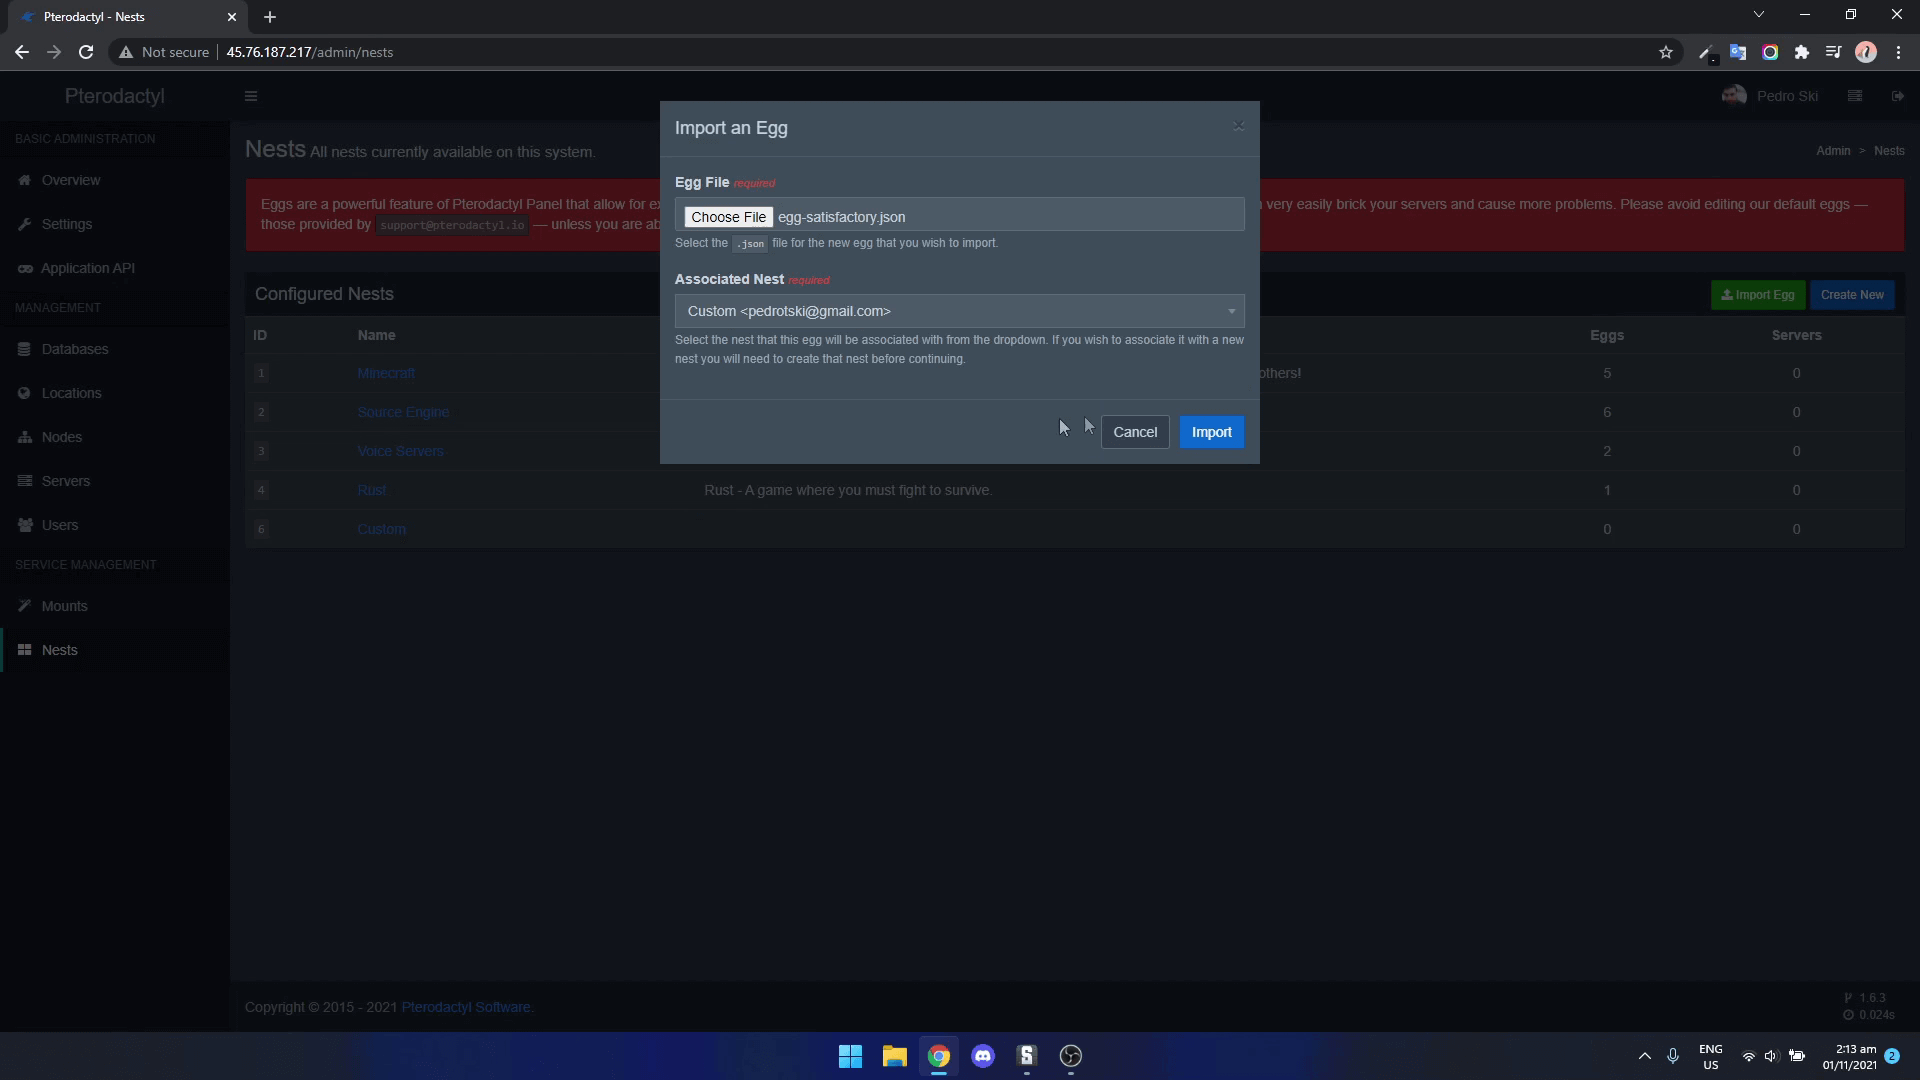
First, download the latest Satisfactory server egg from here. You will need to right-click and save as. After that go back to “Nests” and then click on “Import Egg”.
Browse to where you downloaded the Satisfactory egg, and then set the “Associated Nest” to Custom
Click Import and you should see the message “Successfully imported this Egg and its associated variables.”
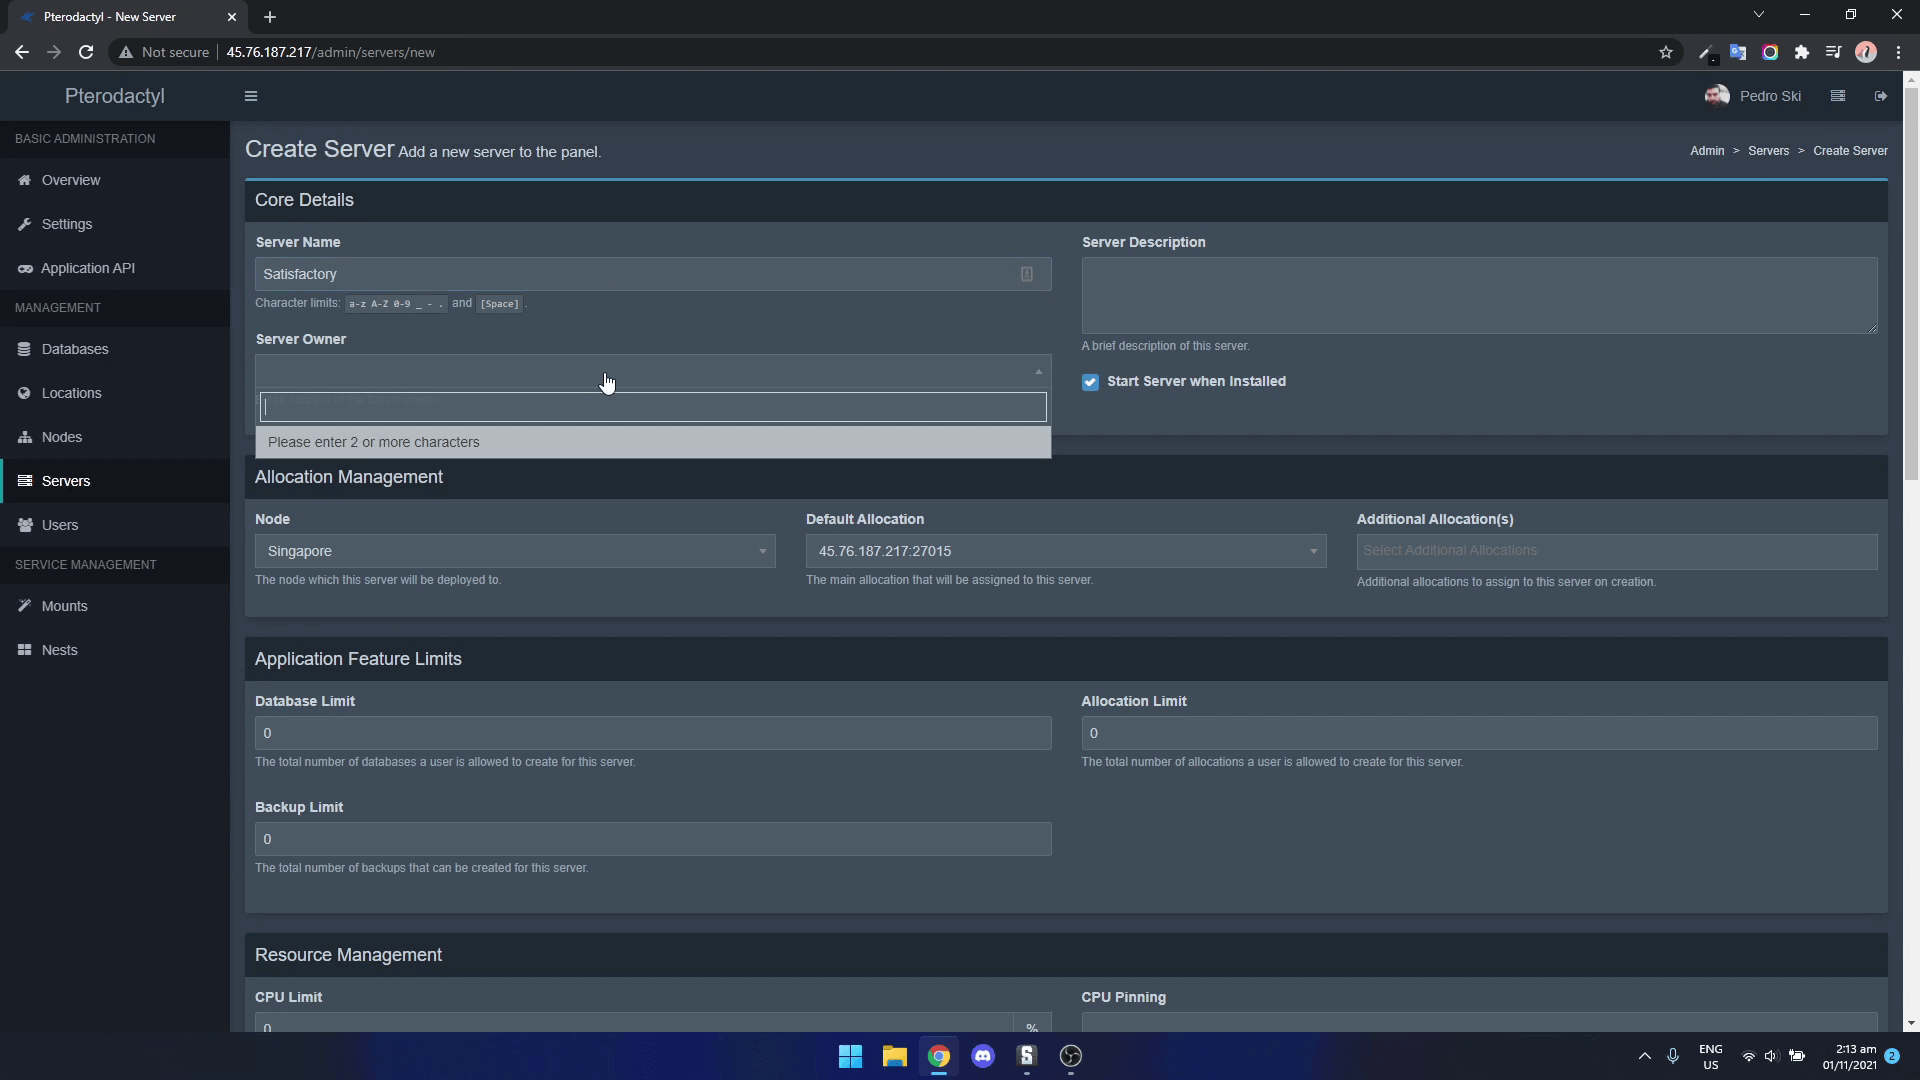
After you have successfully imported the egg, now we need to start the game server instance itself. To do this, you can simply click on Servers then Create New
Now this page may look confusing but don’t worry. It’s really simple. Here are the only things you need to change:
Server Name: This can be anything, for example “My Satisfactory Server”
Server Owner: the account you use to log into Pterodactyl
Memory: 0
Disk Space: 0
Nest: Custom
Egg: Satisfactory
Then click Create Server at the bottom.
It will then say your server is installing. You’re almost there!
Right now you cannot change the default port Satisfactory runs on so we need to assign the ports to your node and game server instance.
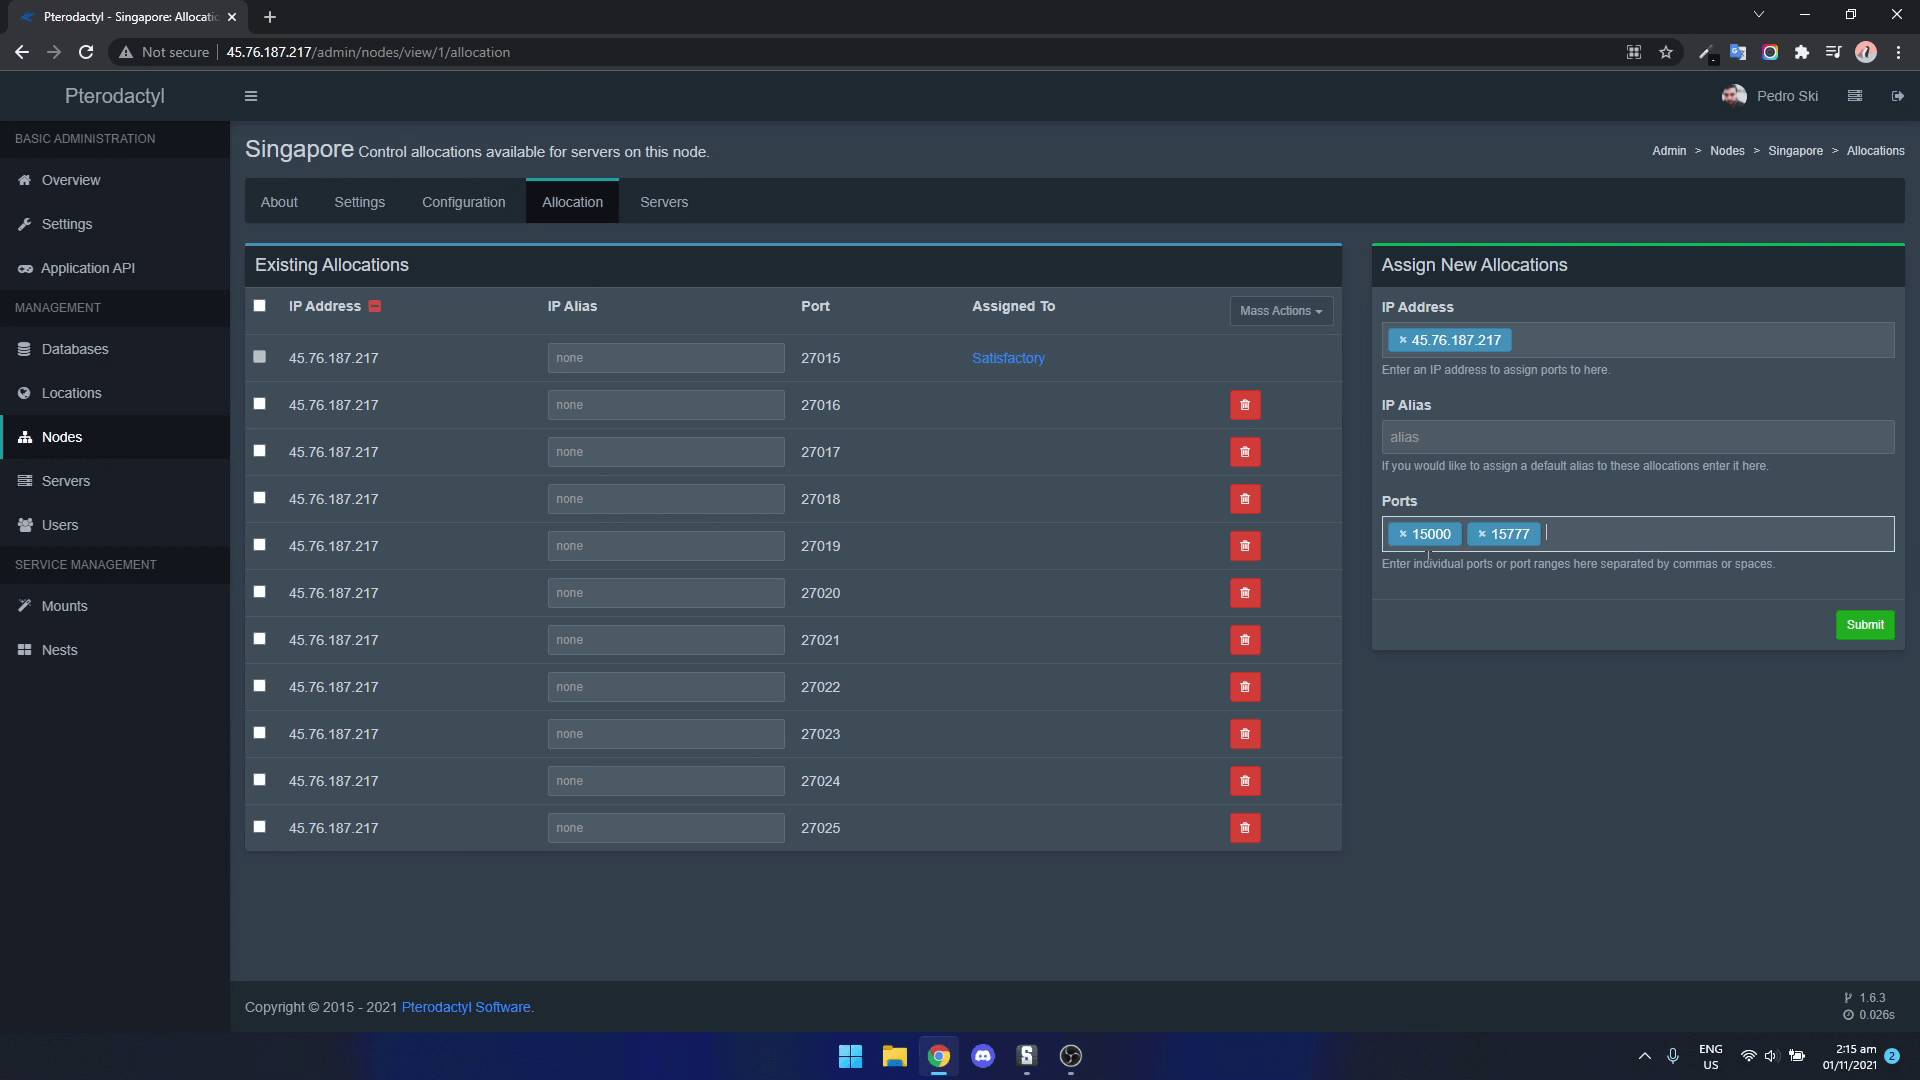
Click on Nodes, select the node your Satisfactory dedicated server is running on, then go to the Allocation tab.
On the right-hand side, you will need to input your server IP address and then assign the ports 15000 and 15777
Ps you can add multiple ports at once by adding a space after the first port
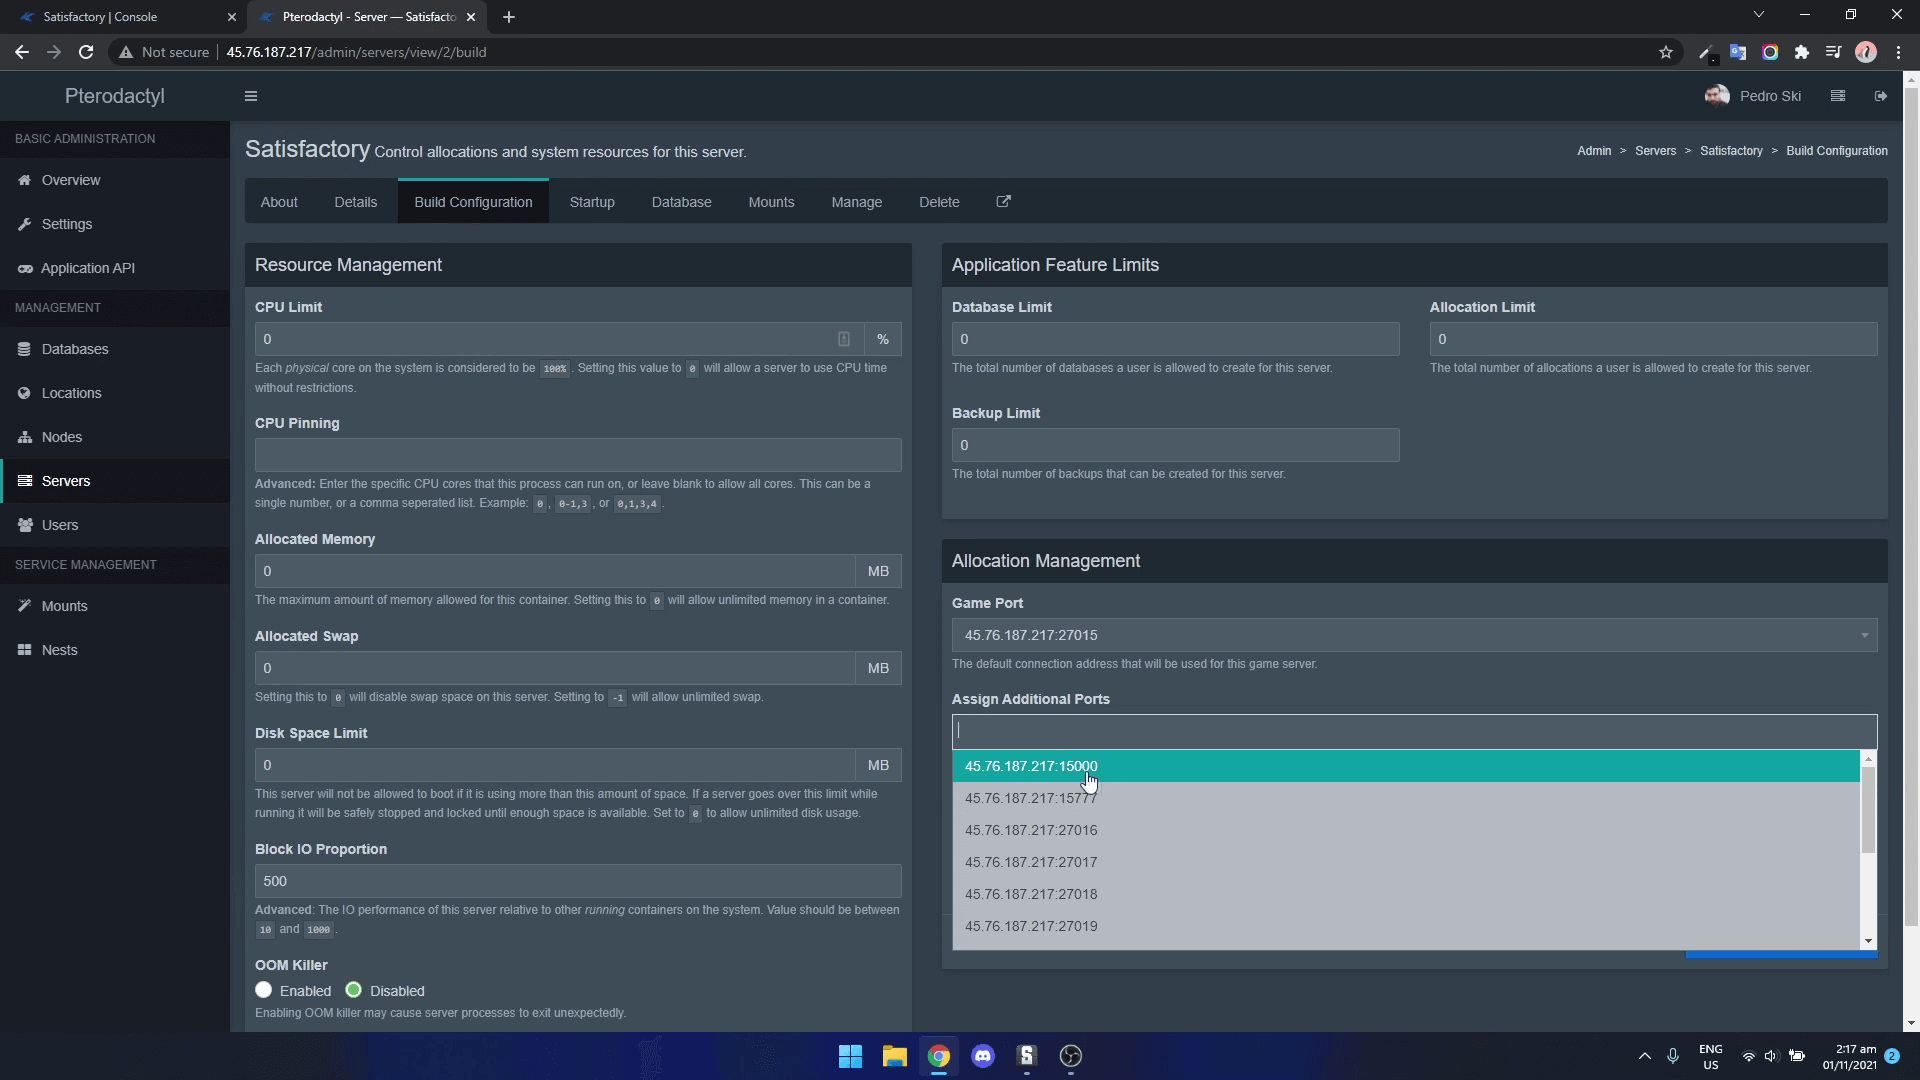
Now we need to assign the ports we just created to our Satisfactory dedicated server instance.
Click on “Servers” then select your Satisfactory server. Click on “Build Configuration” and scroll down until you see “Assign additional ports”. Add the ports we created above 15000 and 15777 then click “Update build configuration”
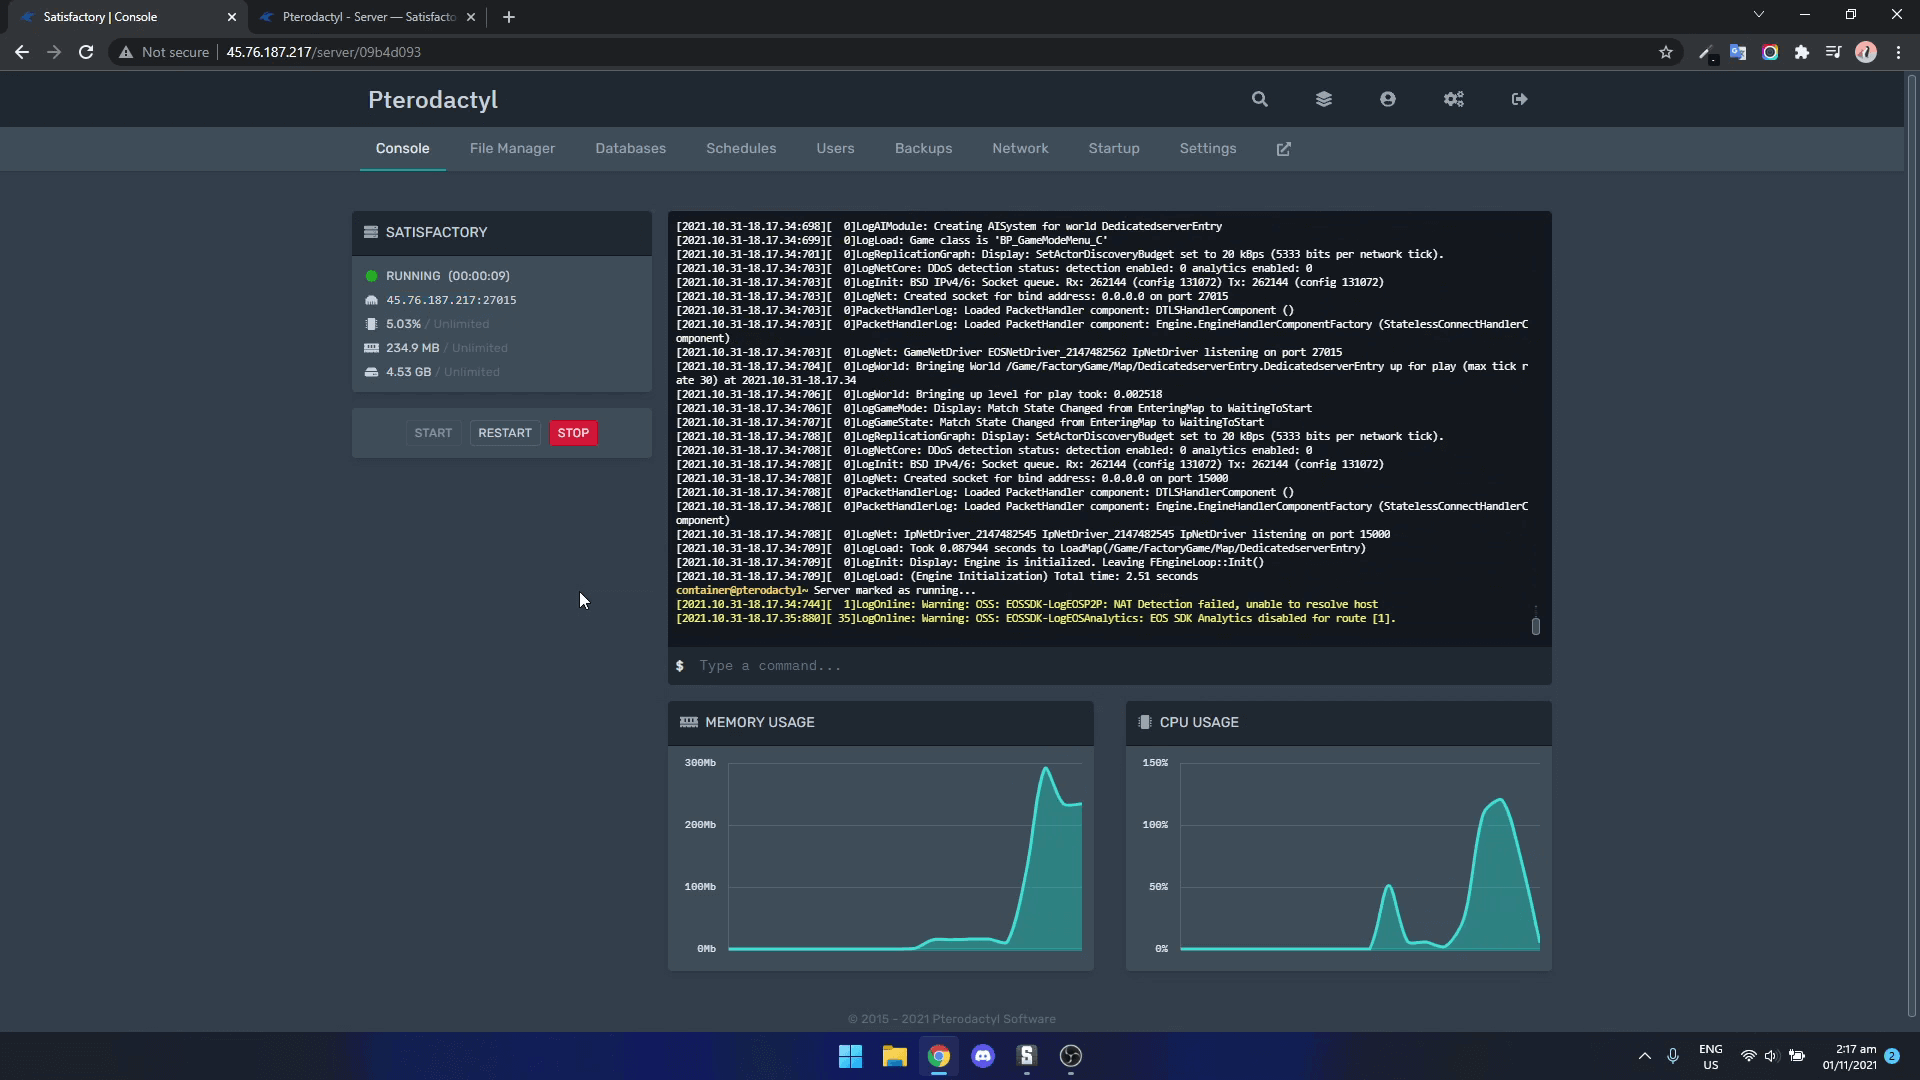
By now, your server should be set up3 and sitting there running, however as we added the new ports, we will need to restart the server. So click on Pterodactyl on the top left-hand corner and select your Satisfactory server instance.
From here you can click restart
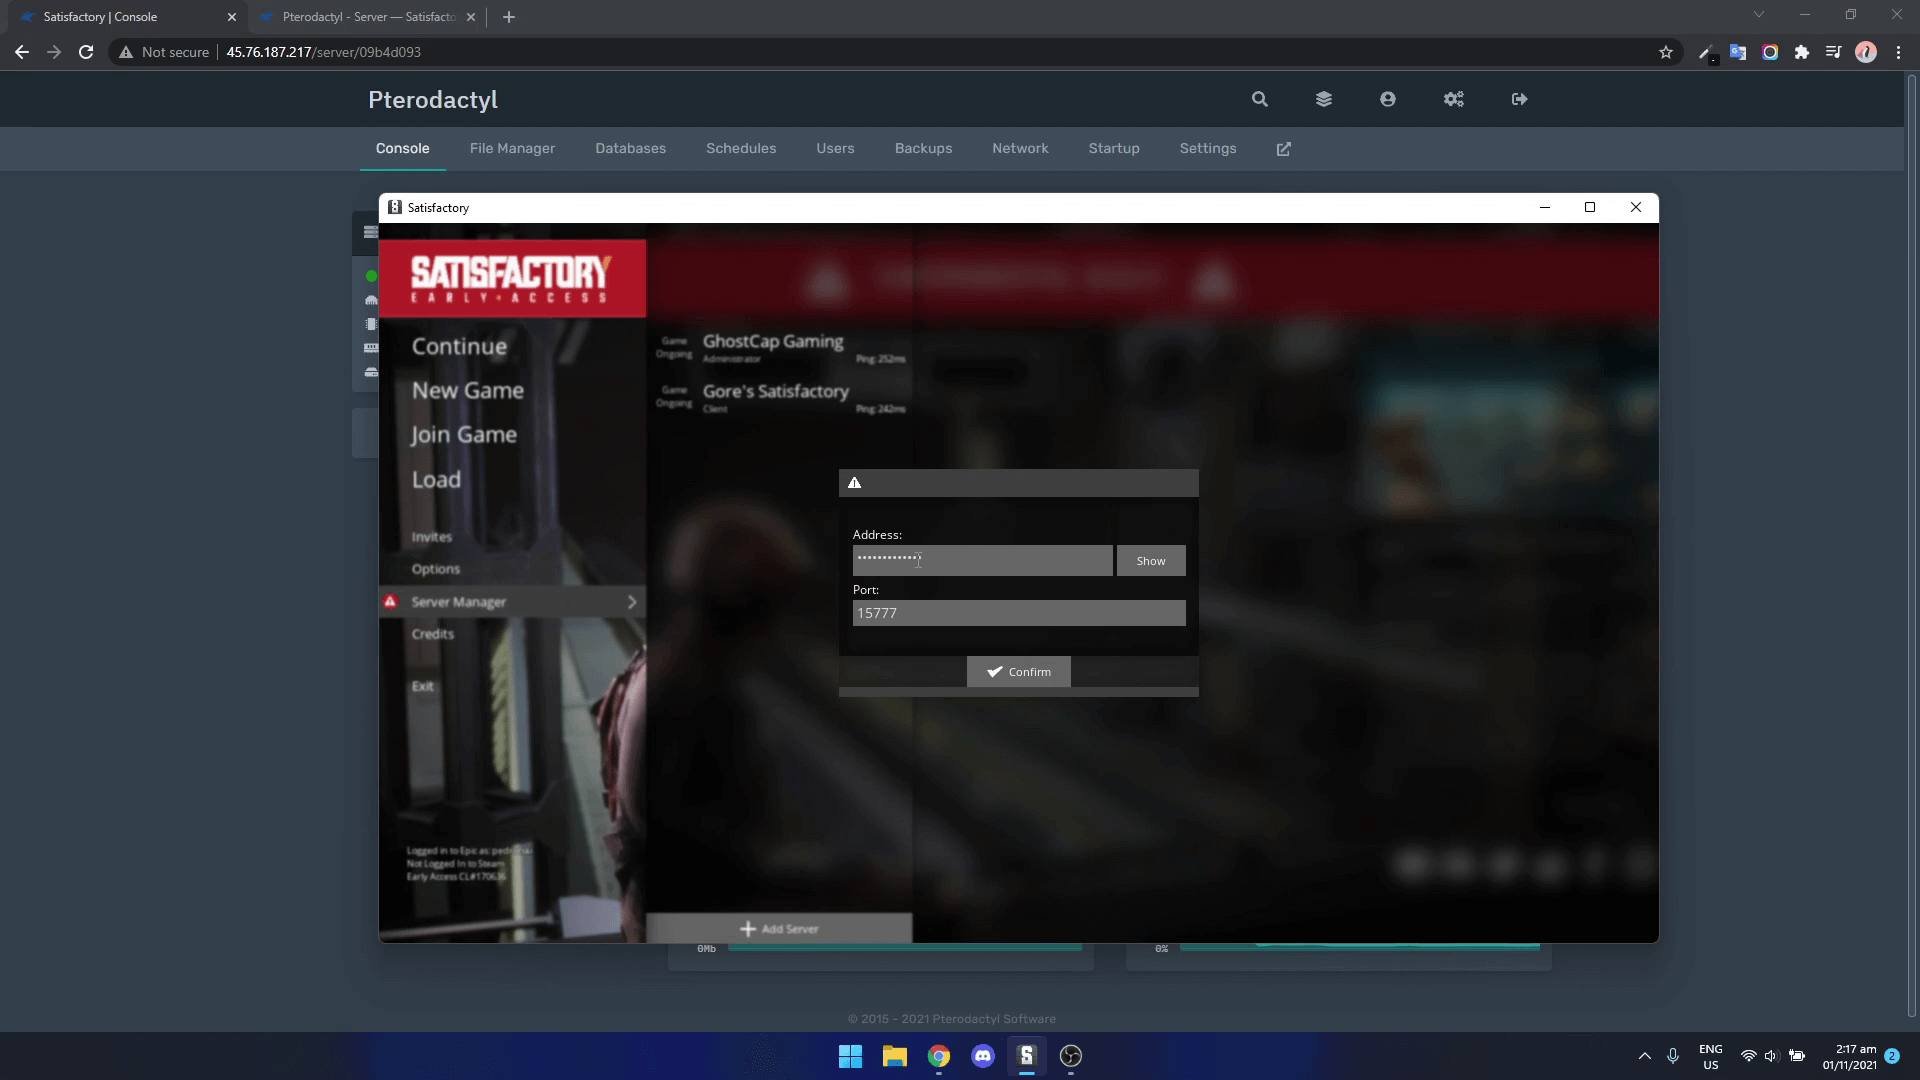
After your server restarts, you can now connect to the server by using your IP address and Port 15777. On the first connection, you will be asked to set up a session password and create a world. Keep in mind that this session password is actually an admin password and should be kept to you only.
Chances are if you're not looking at normal Satisfactory server hosting and you want to host your own server, then you may want to run other games on that dedicated server or VPS.
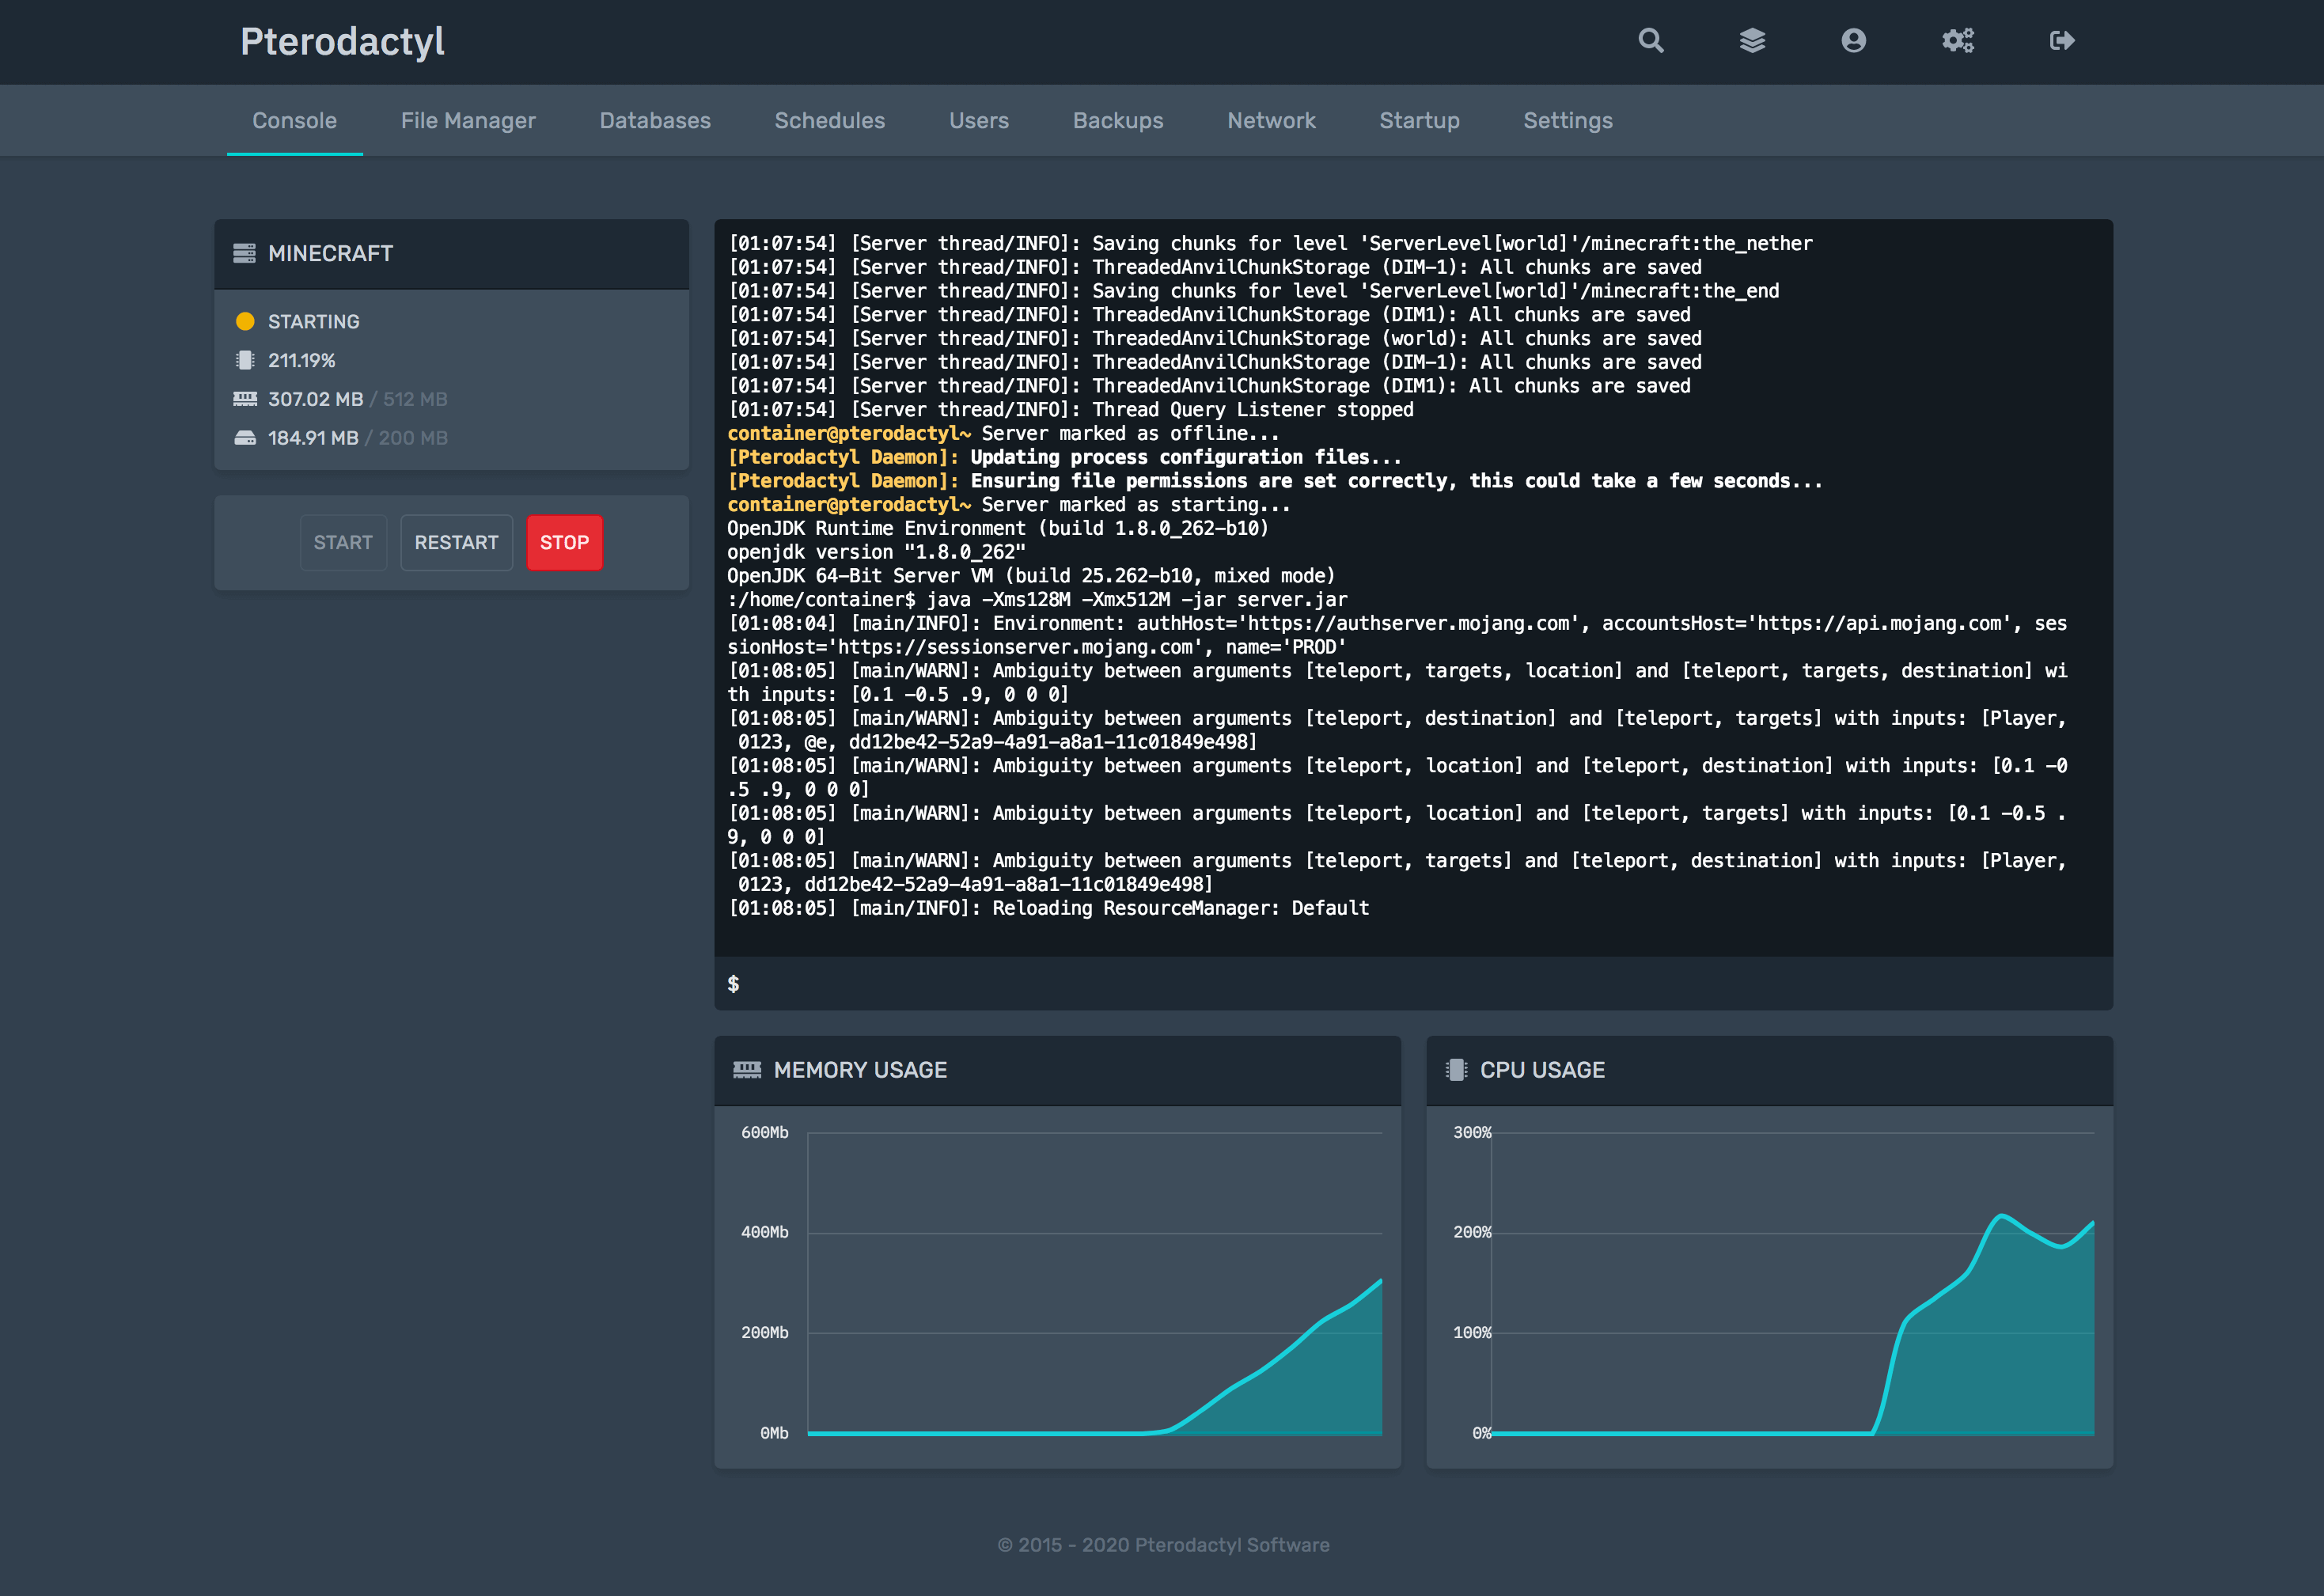
Pterodactyl allows you to manage your Satisfactory server from a beautiful web user interface that you can even access from your mobile phone. This makes it a great option if you're the one hosting the gaming server and need to do a quick restart in just a few clicks.
You can also grant access to other users on the server without exposing your administration password. This means they can log in to the Pterodactyl control panel, start Satisfactory, stop it or even update it, without the risk of them deleting anything.
You also don't need to download steamcmd or anything like that. Once Ptero is set up, your install is pretty much all GUI based.
Satisfactory is always improving, and that means that sometimes you need to update your server. No one likes dealing with updates, but it's necessary if you want to keep playing the game. Pterodactyl makes it easy to update your server.
All you need to do is restart the server instance once a new update is released and then wait. That's it! No need to mess around with commands or scripts, Pterodactyl makes it simple.
So next time there's an update, just sit back, relax, and let Pterodactyl take care of it.
Right now, there are only seven commands that can be used, and they can only be run from inside the game's server manager console tab.
This can be quite frustrating, as it requires players to constantly switch between game and server manager tabs in order to issue commands.
Additionally, the lack of a dedicated server console means that players have to rely on third-party tools in order to run servers. While these tools are typically easy to use, it would be much nicer if there was an official server console that players could use.
Hopefully, the developers will add more commands and a dedicated server console in a future update. until then, players will have to make do with the limited set of commands that are currently available.
The current server commands for Satisfactory are:
| Command | Description |
| quit stop exit | Shuts down the FactoryServer.exe service. (If the server is setup as a service on Linux, it will restart) |
| server.SaveGame saveName | Creates a save of the current session named saveName. For a saveName with one or more spaces, use quotation marks around the name. |
| FG.AutosaveInterval xxx | Sets how often the server performs an Autosave, in xxx seconds. |
| FG.NetworkQuality xxx | Sets the network configuration for the game server.3 is equivalent to the "Ultra" setting in the game client. |
| FG.DisableSeasonalEvents x | Replace x with 1 to disable or 0 to allow the FICSmas event. Requires server restart. |
By default, your Satisfactory server will only support a maximum of 4 players. In Pterodactyl, all you need to do is go to "Startup" and change the Max Players command.
That will modify the file game.ini located here /FactoryGame/Saved/Config/LinuxServer/Game.ini
Just a warning, if you modify that file manually, it will be overwritten once the server starts.
Setting up a Satisfactory dedicated server this way is honestly very easy and doesn't take much time.
However, it's worth mentioning that it's really early days for Satisfactory servers so managing a public server is not a very good move. There is currently no way to ban someone, only kick them.
I hope they give server owners some tools in the future to manage players.
EVER WANTED TO START YOUR OWN GAME SERVER?