

I've been playing Minecraft for a while now and I find it oddly soothing.
It's a great way to unwind after an intense day of work or study.
The thing is, you can't just play by yourself all the time!
You need some friends to help you out with your next building project.
Lucky for you, this blog post will show you how to set up a Minecraft server so that anyone in the world can join!
This guide will walk you through the step-by-step process of setting up your own Minecraft server.
In this Minecraft Server guide I will show you:
Not only will you learn all of this, but it will be explained in a SIMPLE way that anyone can follow.
If you've been on the fence about building your own server then this article should help make that decision easier for you.
If at any point you get stuck, simply join our Discord and someone will be able to help you in our #tech-support channel.
I'm actually going to show you 3 different ways you can set up your Minecraft server, Windows, Linux and Vultr. Each way has its own pros and cons. But every way is as easy as it can be!
Remember though, if you get stuck, simply join our Discord.
Want $100 Free Vultr Credit?
Use our link below to signup for your new game server and get $100 credit you can use.
No coupon required.
Simply click the link, signup and its automatically applied to your account!
The biggest pro is you can literally be up and running with a dedicated server (without having to do any port forwarding!) in as little as 5 mins!
Don't be worried.
If you can click a button on a website, you can install it. I promise you haven't seen a guide this easy before!
Windows is one of the easiest ways to setup a server, but you need to know how to port forward IP addresses. However it is not good for more than a few players online due to the way you need to manage the server.
Pros of a Windows Minecraft Server
Cons of a Windows Minecraft Server
This section is still under construction
This is the way we suggest you make your server. Not only do you get the performance benefits of Linux, but if you follow our guide, you will have a super easy to use web panel that makes it easy to install mods, plugins, edit configs and more!
Pros of a Linux Minecraft Server
Cons of a Linux Minecraft Server
This section is still under construction
This is the fastest way of setting up a Minecraft server that will allow you to EXPAND your servers if they start getting bigger. We will be setting up Minecraft on a Vultr VPS, which stands for virtual private server and it's perfect because our system can easily expand when needed.
Pros of a Vultr Minecraft Server
Cons of a Vultr Minecraft Server
So let's get started.
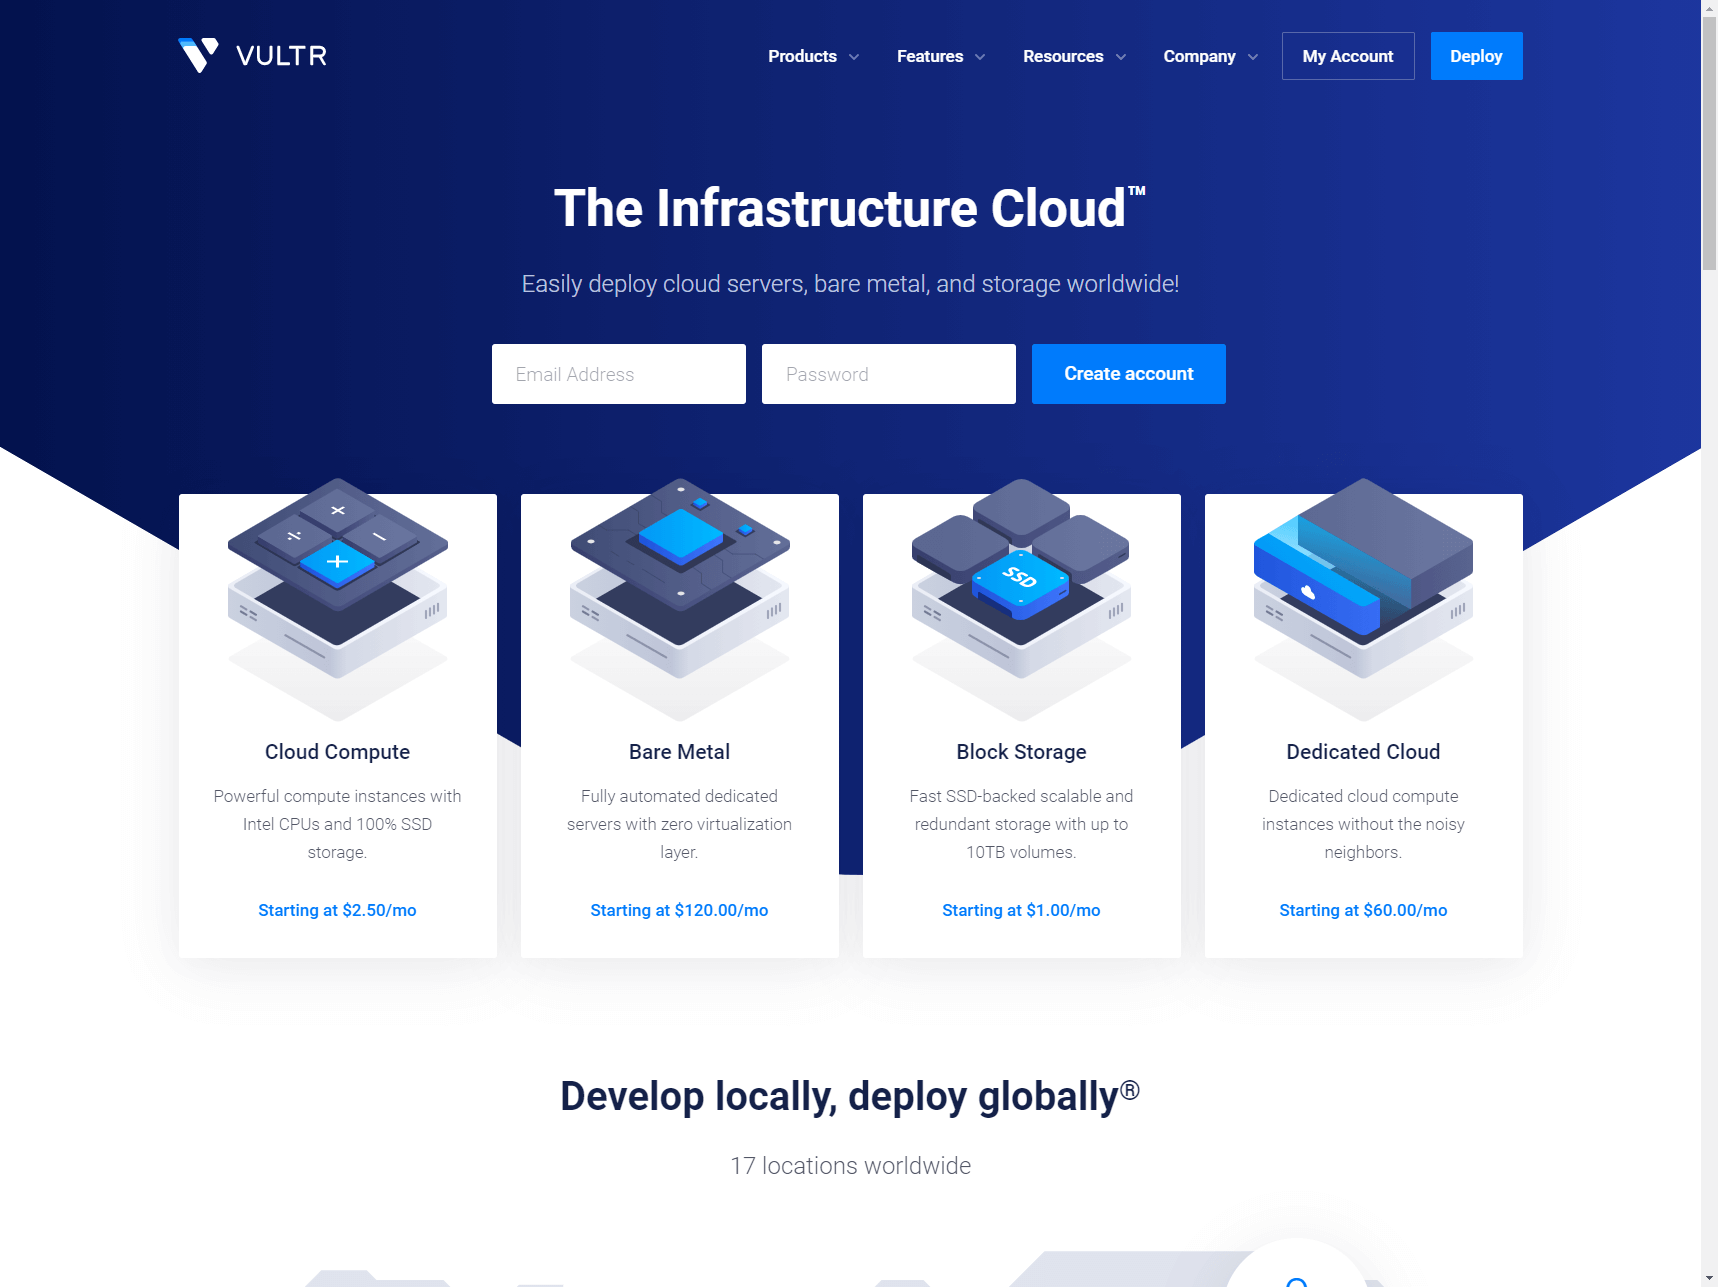
The first thing we need is to get a VPS server. To do this simply set up an account at
Click Sign Up on the top right hand side.
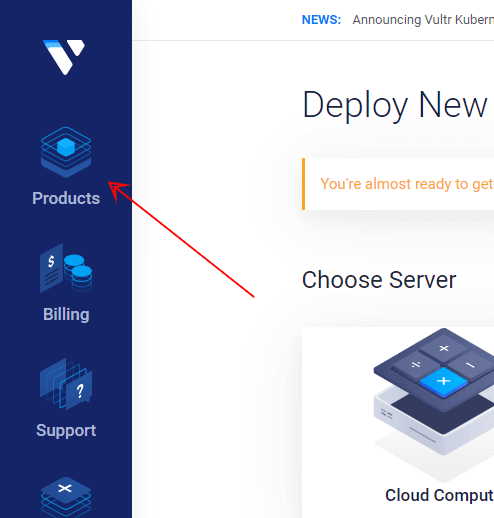
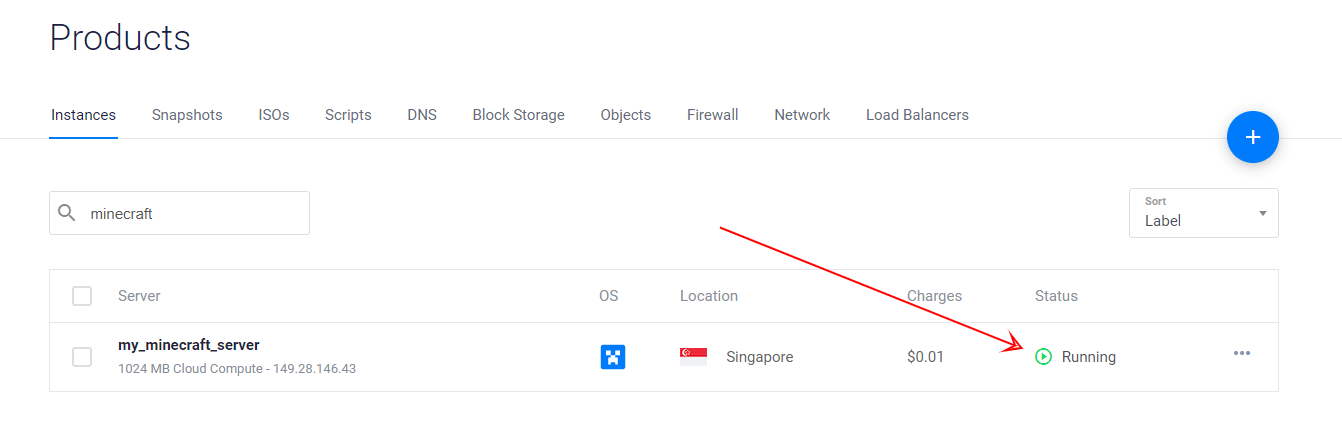
After you have set up your account and are logged in, click on "Products" on the left-hand side.
On this page is where we are going to deploy our new VPS.
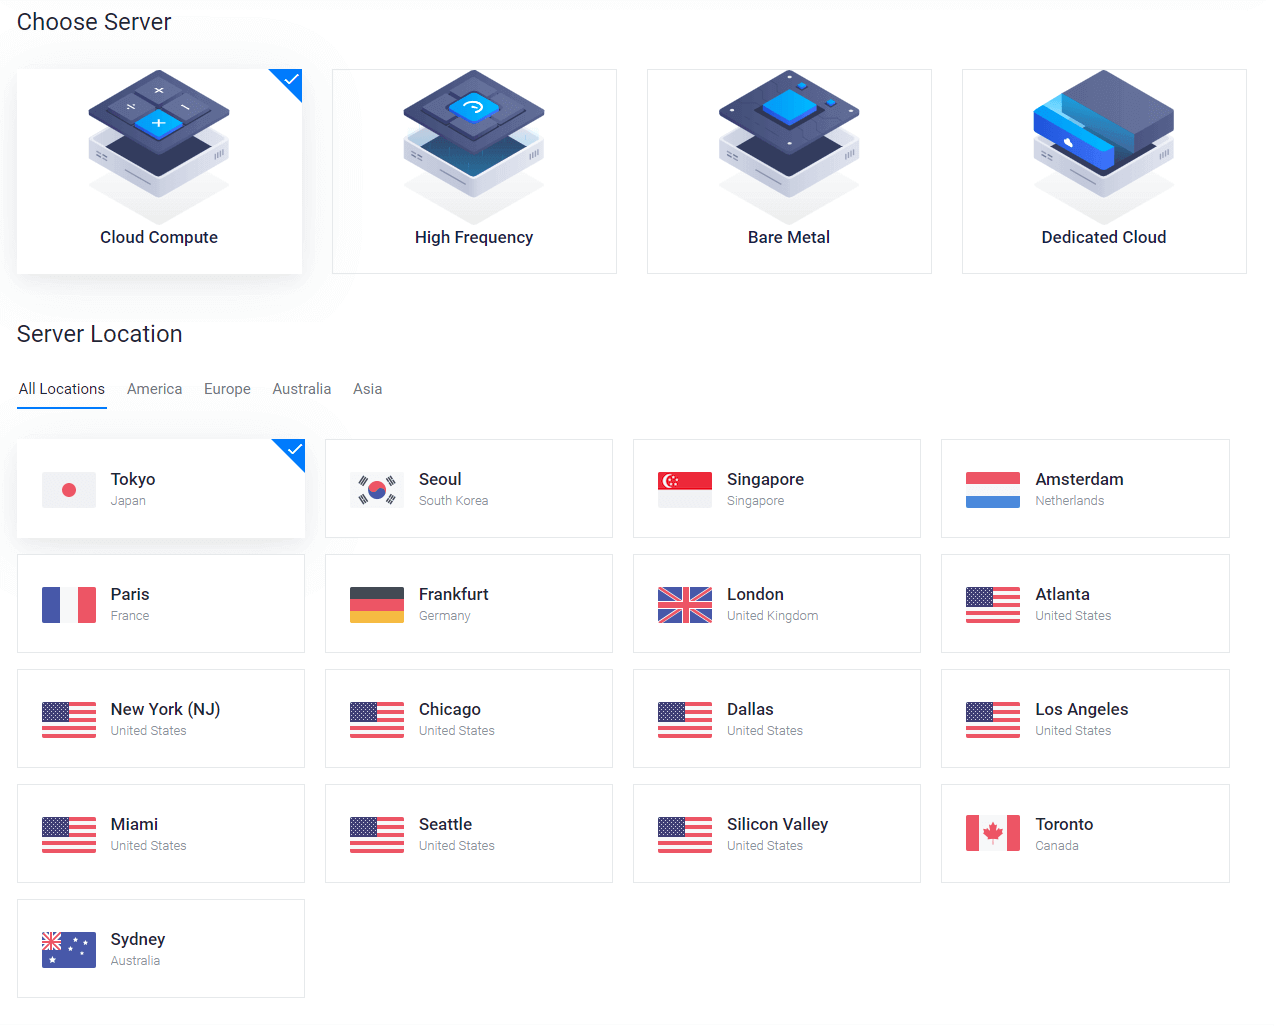
Now we need to select what type of VPS and location. You can either choose "Cloud Compute" or "High Frequency". The difference is High Frequency is faster but costs $1 extra per month.
As for the location, it's best to select what location is closest to you for the best performance.
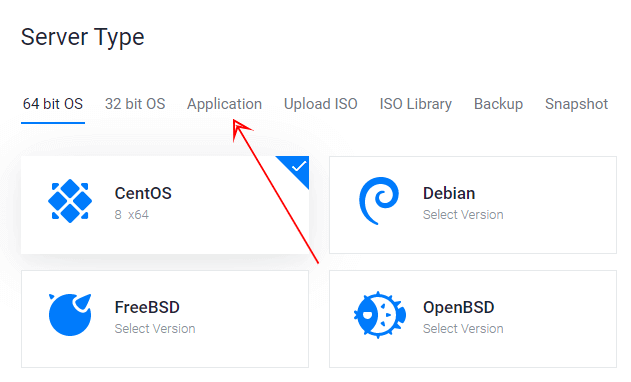
Now we need to select the server type. For this simply click "Application"
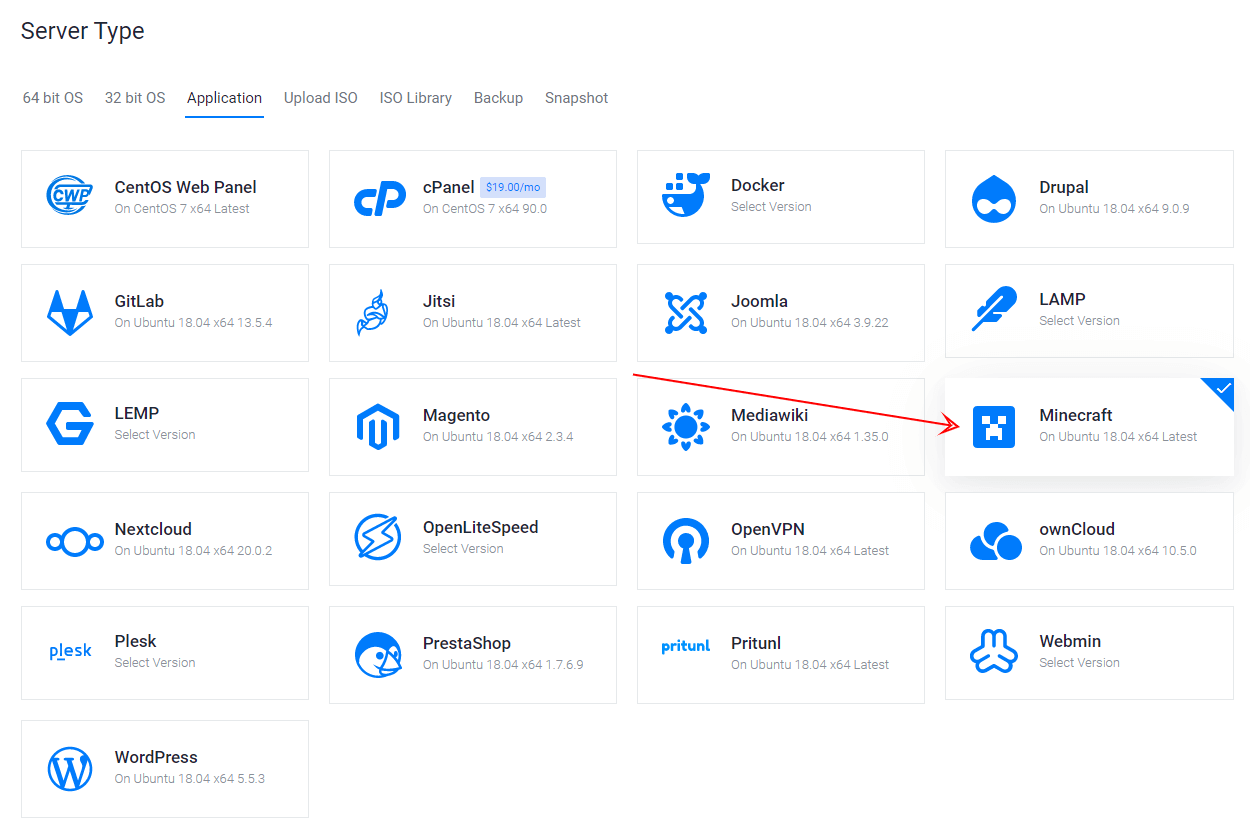
And then select "Minecraft"
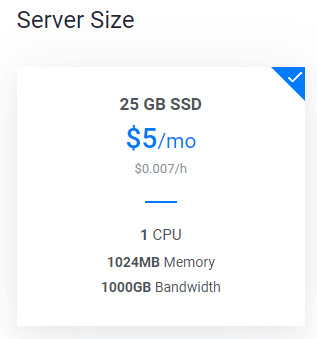
Select the server size that fits in your budget and the amount of Memory/Ram that fits your intended user base (We have an entire section on this later on in the post)
Just as a quick example:
For this tutorial we will be using the $5 plan but remember, you can UPGRADE at any time instantly!
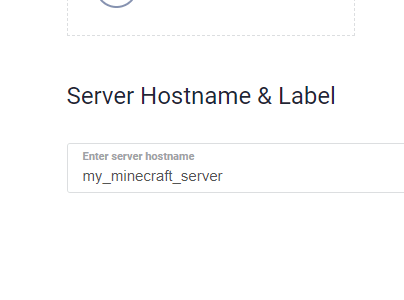
You can skip the rest of the options until the very last one and that is "Server Hostname & Label". You can make this whatever you want.
After that click Deploy
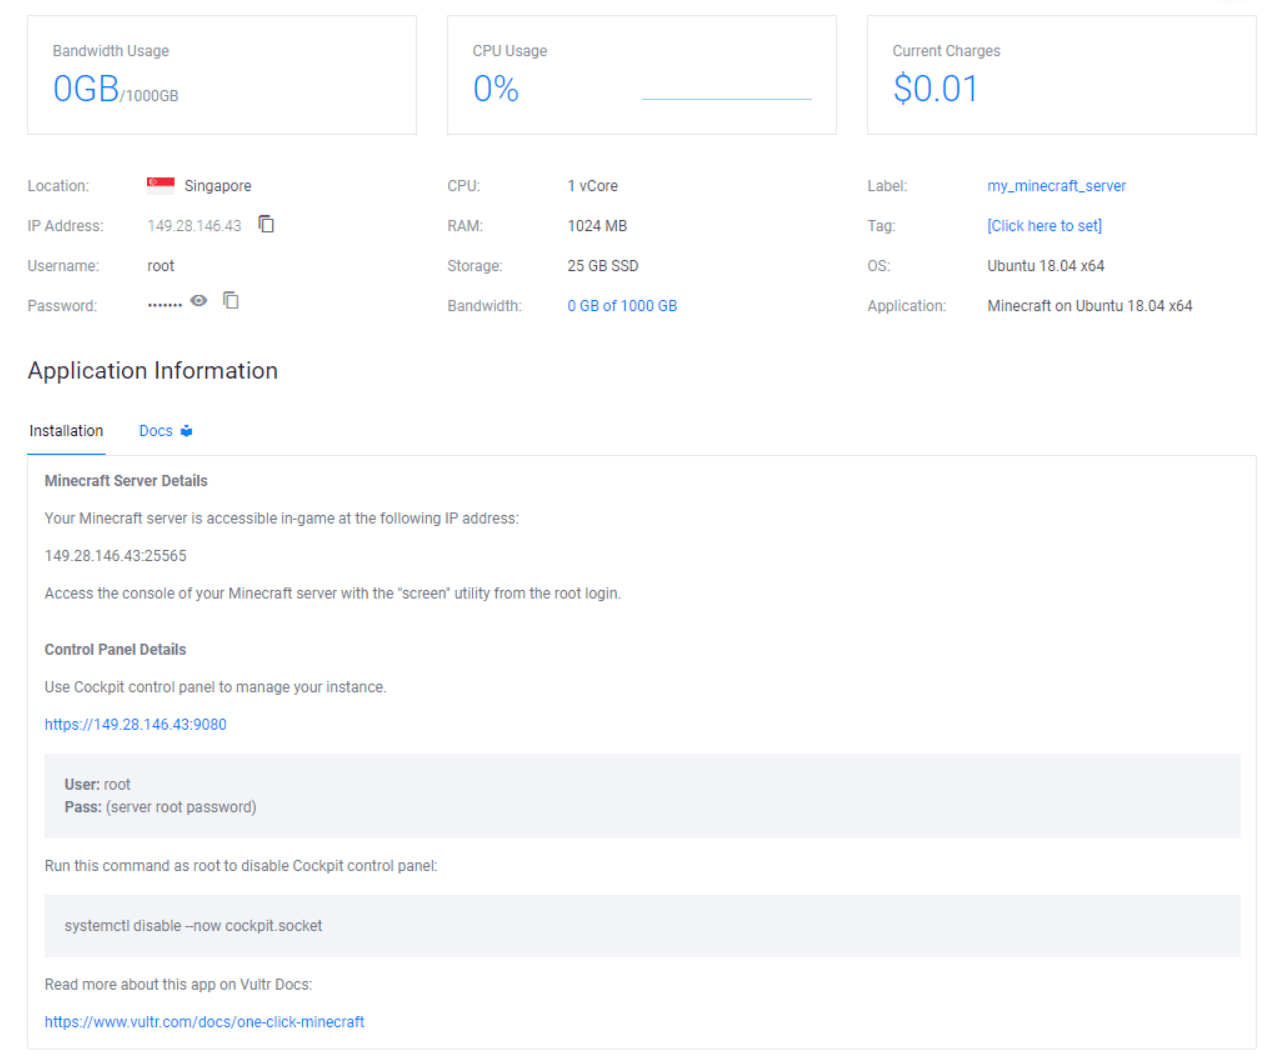
After you have deployed your new server. You will see installing for a few minutes and then after it will say Running. Simply click it to enter the Minecraft Server dashboard.
That's it! You can simply connect to the IP address they give you and access the server via the dashboard.
See that wasn't that hard! This is the easiest way to set up a Minecraft server that I know of right now.
Most of the time when it comes to Minecraft, people want to install plugins or mods.
People normally get intimidated but it's actually VERY EASY!
Follow along and you will be running mods in no time!
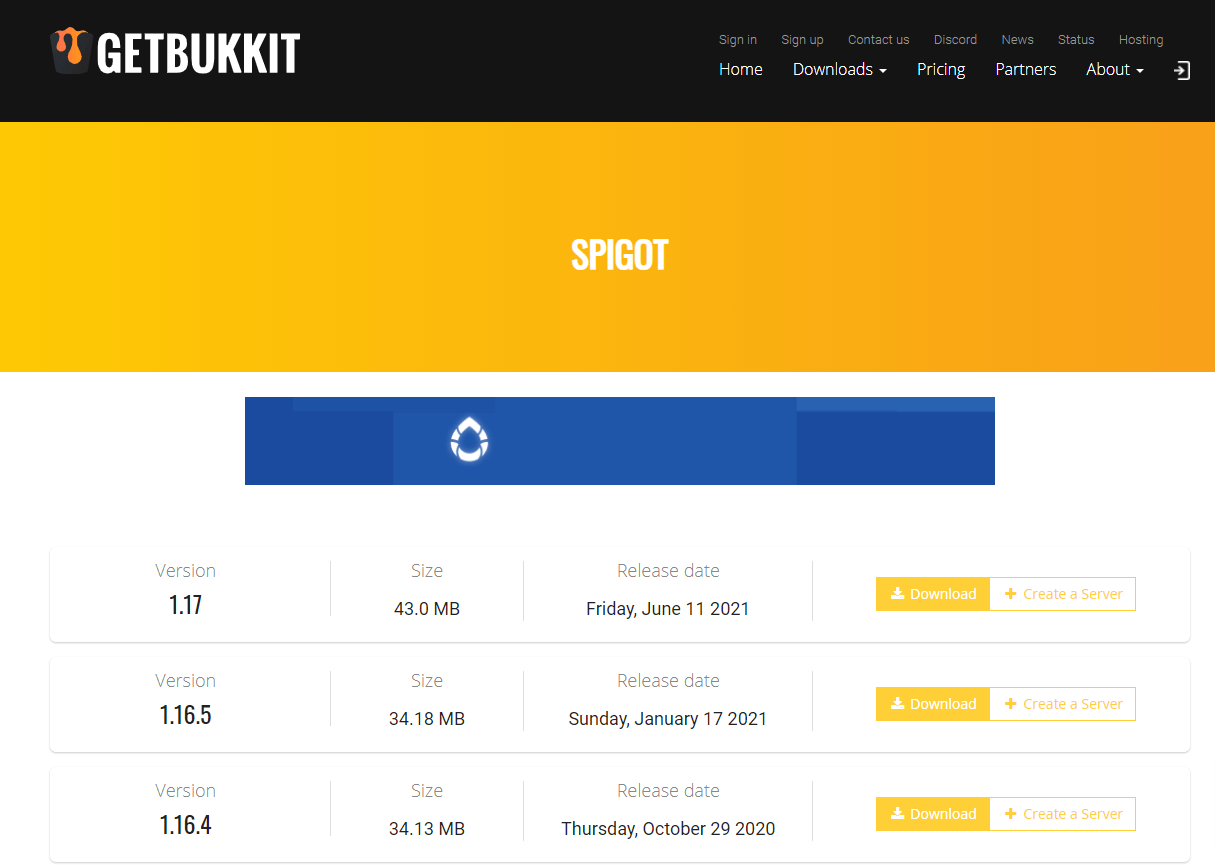
Installing Paper, Spigot or Bukkit will allow you to run mods on your Minecraft server. You can get the latest build of Spigot from here.
Copy the .jar file you just downloaded to your Minecraft server install directory. I simply renamed my spigot.jar to it worked with our server. If your running vanilla minecraft, call it whatever your default .jar is called. Usually its simply server.jar
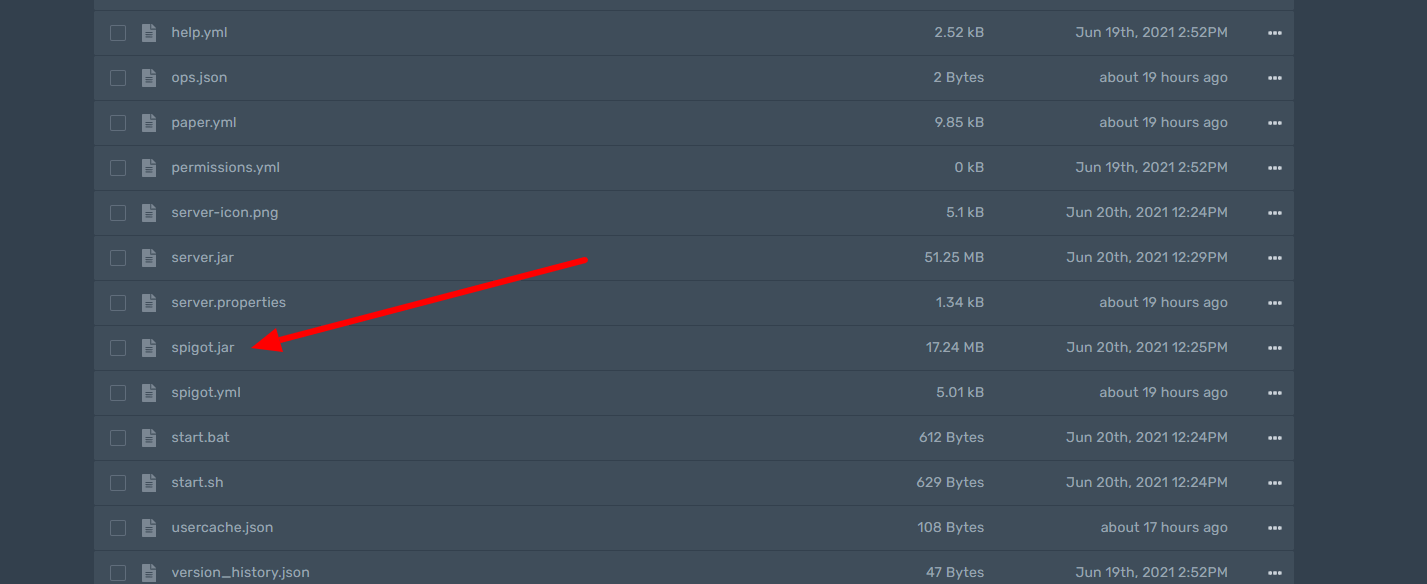
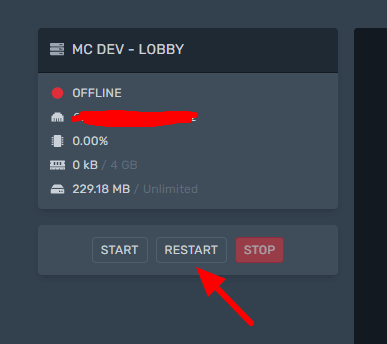
Restart your server to update any files that need to be updated.
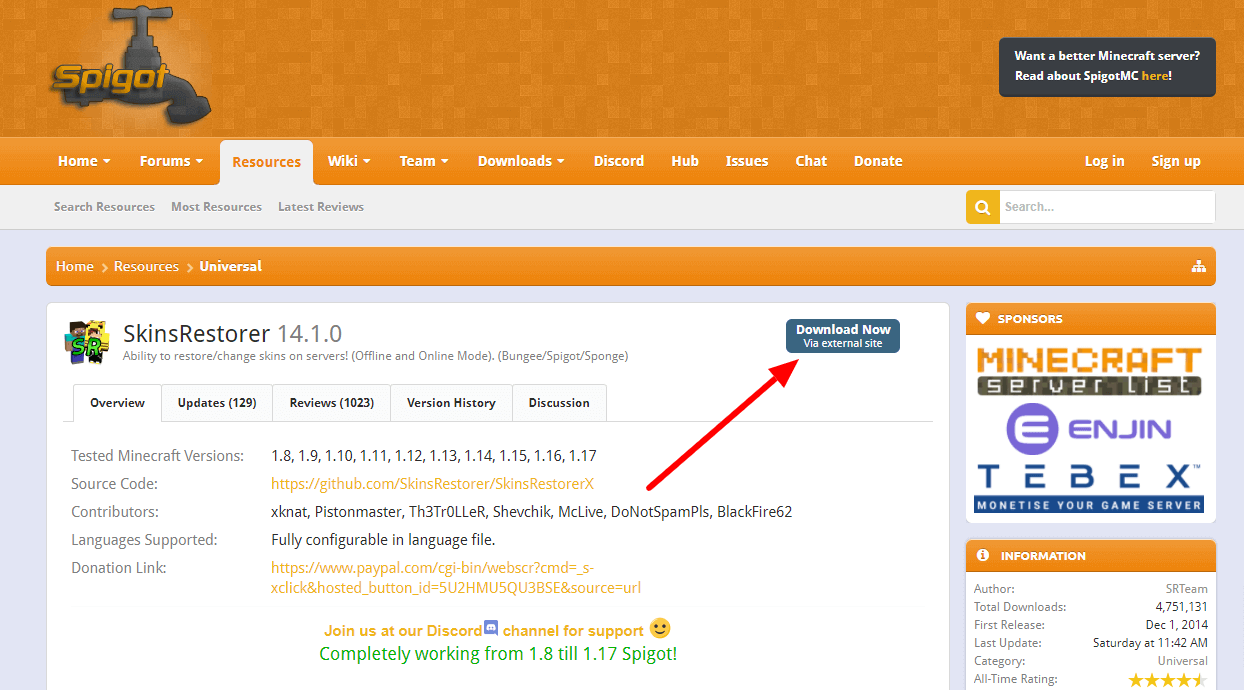
To find plugins I use a site called SpigotMc. Simply look for the plugins you want to install on the list. For this demo we are going to install Skin Restorer.
Once you're on the page for the plugin you want. Click on Download Now.
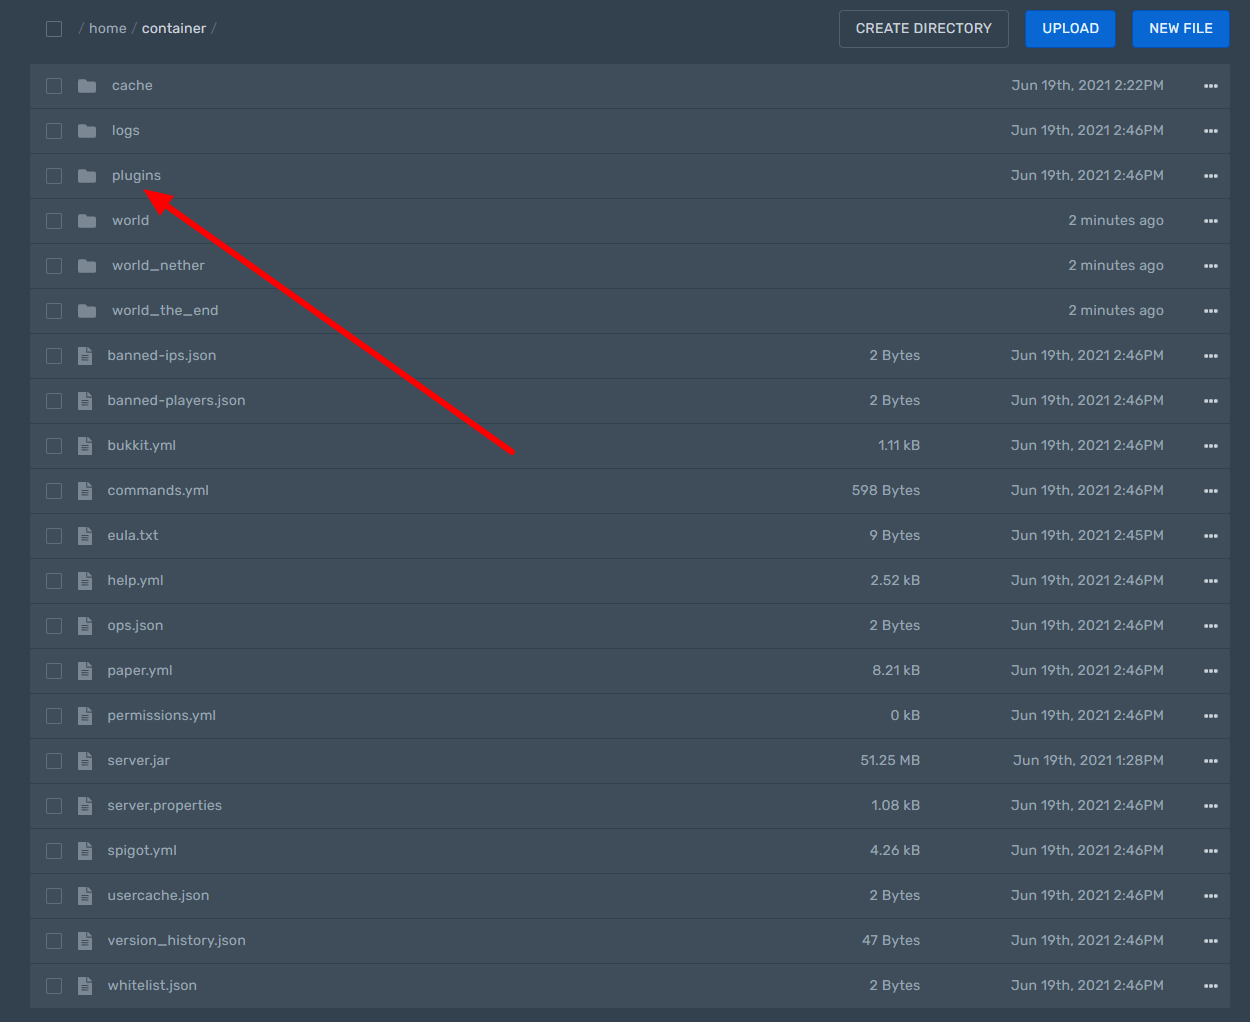
After you have downloaded the .jar. You will need simply need to put the file you downloaded into the plugins directory. This is located in your default Minecraft directory.
All that is left to do now is to start your server and the plugin will then be installed and running. If for some reason the plugin doesn't work, then read the comments on the SpigotMC page and you will find some helpful tips to get up and running.
One of the biggest reasons to start your own Minecraft server is to have 100% control over what is going on. For example, if you are playing on someone else server, at any moment your builds could be wiped, raided, or your progress could simply disappear!
This is because in the end they only care about 1 thing, and that is themselves.
And rightfully so, you are playing on their network and most of the time, you are playing for free! They have every right to do what they want!
This is why we always suggest it's best to run your own server. Be in control.
The next major reason is privacy. For example, if you only want to play with a select few of your friends, you can do so very easily. All you need to do once you start your server is to give them the IP address to connect to and that's it. Once you are done playing, you can simply turn off your server and you don't need to worry about being grieved or anything while your offline.
When you set up your own Minecraft Server, You have the option to install any mods and plugins that you want.
That's it for now with our Minecraft Server guide. We will have this updated in the coming weeks with the other methods!
Remember to come and join us on our Discord if you need any help.
EVER WANTED TO START YOUR OWN GAME SERVER?